Whelping Box Plans
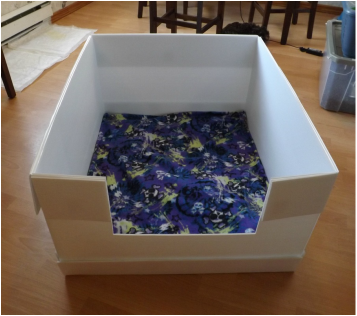
After a ton of research into building a whelping box I found nothing that had all the qualities I was looking for in a box. I was looking for something that was easily washable, waterproof, fairly sturdy, light weight, cheap ,easy to build and easily disassembled for storage. This is what I can up with. I decided to wright a post to help benefit other breeders out there!
My finished box is 30"x 36" and is 16" high. This is the perfect size for my Cockapoos Mamas ranging in size from 15-30lbs
To build this box no power tools are needed just a simple pair of sharp scissors and a utility knife!
Items you will need:
-a sharp pair of scissors
- a crayon for marking (it easily wipes off with a magic eraser)
- a tape measure
- a straight edge
- a utility knife
- 10 feet of 2" wide industrial strength heavy duty adhesive backed velcro (wal-mart)
- 2 4'x8' 4mm corrugated plastic or coroplast. This is the stuff sign guys use to make signs (home depot $23 a sheet ,You can get it much cheaper if yo live near a manufacturer as low as $11 a sheet and in a variety of colours )
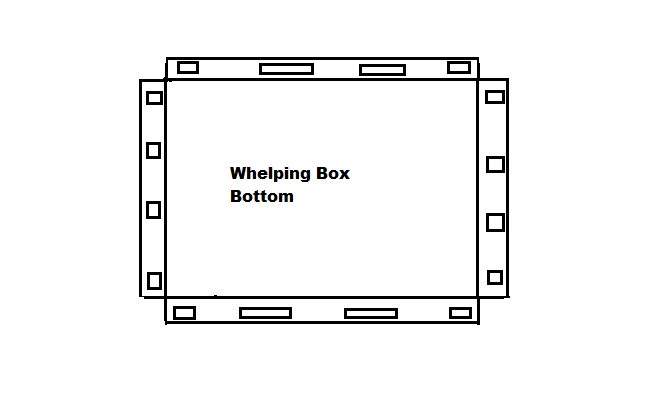
1. Lay your sheet of corrugated plastic flat. With your crayon measure and mark a 38"x 44" rectangle on your sheet.
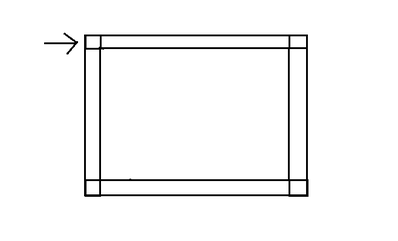
Measure another line 4" inside the outer line of your rectangle on all 4 sides. You should have 2 rectangles one inside the other with small boxes in each corner. With you scissors cut out the larger outer rectangle Then cut out all 4 boxes in the corners.
With you utility knife and a straight edge very carefully score the first layer of the corrugated plastic along the inner lines in you rectangle. BE VERY CAREFUL NOT TO CUT ALL THE WAY THREW THE PLASTIC. YOU WANT THE OUTER LAYER TO REMAIN INTACT!
Take Velcro and attach the male and female sides together. Cut 4 3" strips of velcro for each side of you rectangle.
Flip over your rectangle and fold up the 4" flaps you have just created. Peel off the back of one side of your velcro strips and stick them firmly and evenly spaced along each flap.
Take Velcro and attach the male and female sides together. Cut 4 3" strips of velcro for each side of you rectangle.
Flip over your rectangle and fold up the 4" flaps you have just created. Peel off the back of one side of your velcro strips and stick them firmly and evenly spaced along each flap.
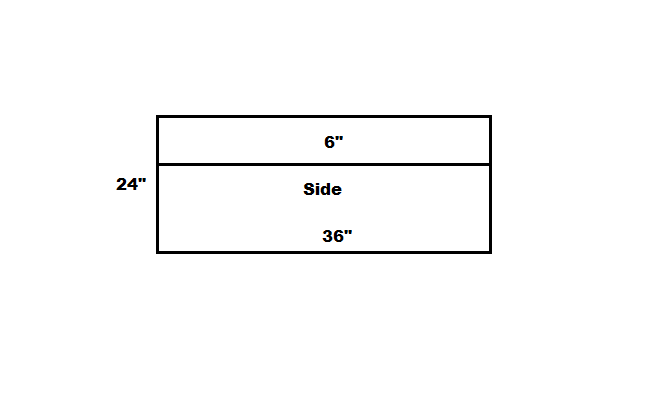
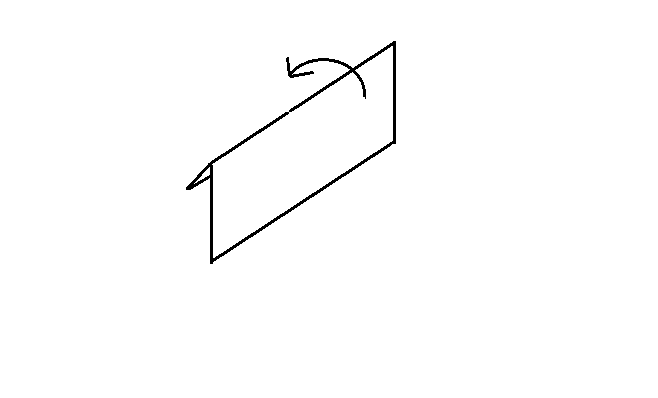
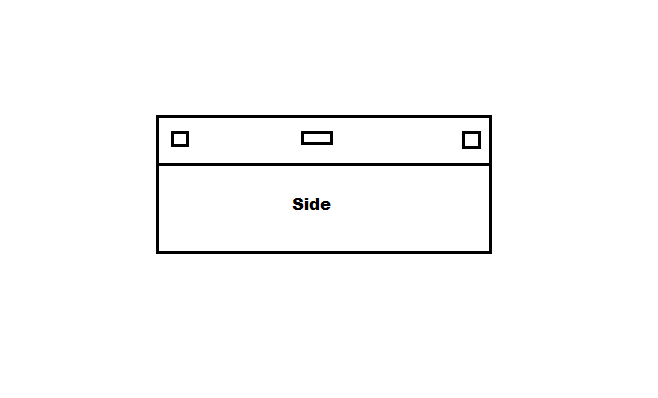
2. On your second sheet measure and mark 2 rectangles that are 36"x 24". Cut out with your scissors. Measure 6" from the top edge of your rectangle mark and draw line across the top. Score with your straight edge and utility knife and fold over. Do the same for both rectangles.
Flip over your rectangles and firmly place 3 2" strips of velcro to the underside of flap.
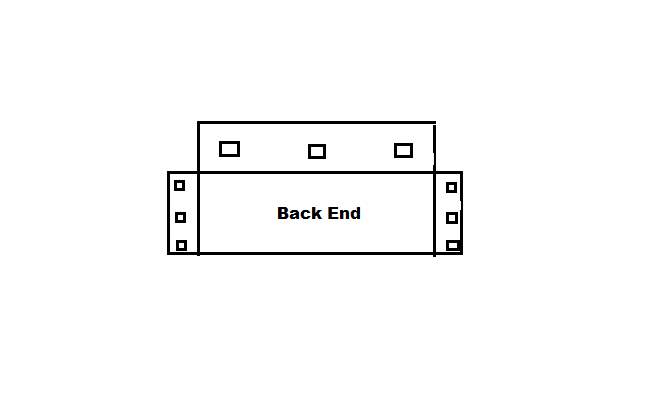
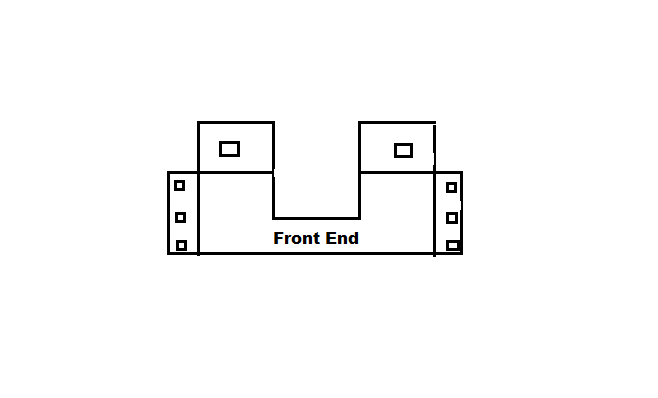
3. On what is remaining of the sheet measure and mark 2 38"x 24" rectangles. Cut out with your scissors. Measure and mark a line 6" for the top edge. Score. Flip over you rectangles and measure and mark 4" in from edge on the short ends. Score. Cut out the squares in the upper left and right corners. Fold over upper edge and firmly place 3 2" stripe of velcro on the underside. Flip over and place 3 2" strip of velcro along the inner side of each side flap.
On one of the rectangles measure and mark 7" in from edge on either side of upper flap. Measure and make 15" down from upper edge of flap to create a opening for the entrance way. With your scissors cut out the opening.
GREAT! all the hard work is done now we assemble!
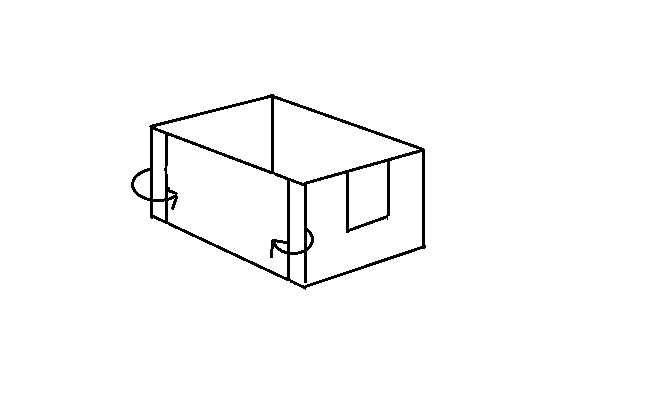
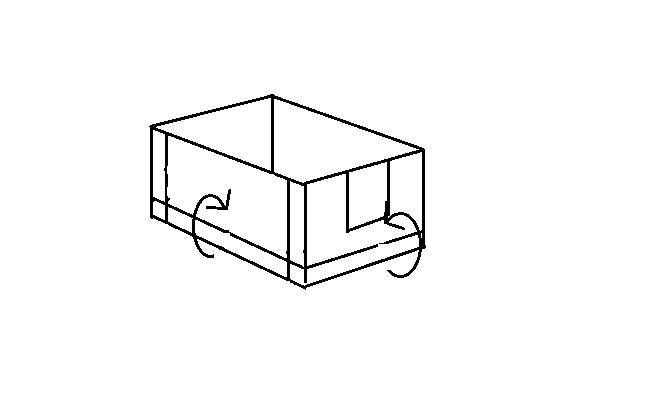
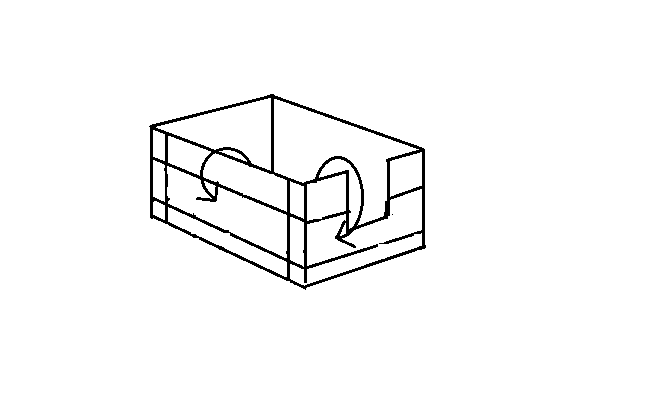
Take your end piece and your 2 side pieces. Place them on end on the floor with withe the 6" upper flap facing up and out.
place the side piece end tightly against end piece in flap crease. Remove the remaining backing to the velcro on 4" flap of end piece and press firmly in place against side piece. Repeat the same process for front piece.
Place your bottom piece on the floor velcro side up. Place your assembled walls on top. Peel off the velcro backings and fold up the bottom 4" flap on all 4 sides and press firmly in place.
Peel off the backing on all the remaining velcro pieces on the upper flaps and press firmly in place.
Allow the adhesive on the verlcro to set for 24hrs.
This is the directions for a basic box you can add a pig rail made out of PVC pipe if you like. You can also get some H channel and cut it to fit the left, right and bottom side of you entrance opening. Slid it in place and cut a door piece to fit. The door slides in the top and allows you to contain your pups better as the get older.
YAH! YOUR DONE!
SIT BACK AND ADMIRE YOU WORK!
SIT BACK AND ADMIRE YOU WORK!
